
 Apni previous posts mein hum discuss ker chukay hai k Junk Files kia hoti hai, iski 3 types per bhi baat ker chukay hai jo k Temporary Files, Temporary Internet Files / Cache aur Internet Cookies hoti hai. Humne yeh bhi dekha hai k kis tarah software ko uninstall kernay ka bawujood peechay junk reh jata hai. Aj hum finally baat kareingay is k solution per, k akhir in junk files ko system se caisey nikala ja sakta hai.
  Yeh files computer mein her jagah per pheli hoi hoti hai. To koi aisa solution hona chaiye jo k bager ziada mehnat kye hoe in sari files ko computer mein se nikal de, aur computer ko ek dum clean kerday. Aur sath hi sath Registry mein bhi jo errors wagera ajatay hai woh bhi fix kerday. Yeh sab chizein waisey to buhat saray softwares ker saktay hai, mager aisa software jo k ap easily use ker sakay bager kissi mushkil k, us software ka naam hai CCleaner.
Yeh ek Free System Optimization tool hai, jo k use kia ja sakta hai ap k computer mein se junk files, registry mein errors ko nikalnay k lye. Sab se khas baat is software ki yeh hai k yeh buhat hi asaan hai. Is ko koi bhi Non-technical banda bhi asani se use ker sakta hai. Normal pc users softwares ko install kernay se pehlay buhat sochtay hai k kia kerna hoga, ya kahi kuch aur hi ulta seedha na ho jaye. Mager is mein aisa kuch nahi hai. Simple click click kerna hai aur baqi kaam sara yeh software khud hi ker dayga.
How to Use It – Step By Step
Installation Of CCleaner
1. Ap yeh software download ker saktay hai FileHippo.com site se by Clicking Here or ager ap main company ki site ko visit kerna chahtay hai jis ka yeh software hai, to company ka naam hai Piriform, aur unki website ko check kernay k lye Click Here.
2. Jab file download ho jayegi (The downloadable file size is only 3.97MB) Double click the file and run the Installation.
3. Installation kernay k steps buhat hi asaan hai. Apko sirf next next kertay rehna hai (jaisa k hum laug her dafa kertay hai lolz).
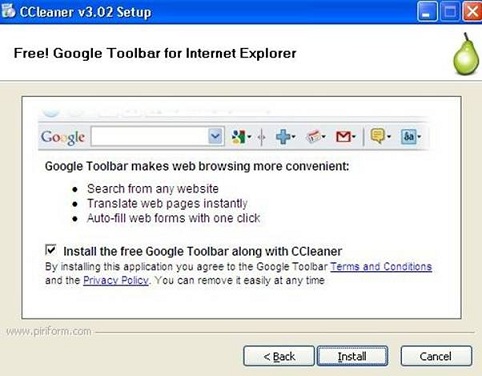
4. Installation k doraan, jaisey hi yeh screen aye jaisa k ap neechay picture mein dekh rahay hai, to ab ap k uper hai k ap Google Toolbar ko install kerna chahtay hai k nahi. Check or Un-Check the tick mark and Click Install.
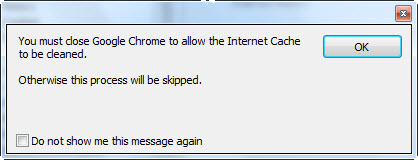
5. Jab setup complete ho jayega almost, to yeh dialogue box pop-up hoga as shown in below picture.
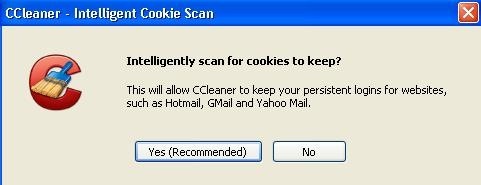
6. Yaha per yeh software pooch raha hai k,kia ap apnay emails ki login information ko browser mein save rakhna chahtay hai. Ager ap chahtay hai k save rahay to phir yeh software yeh information ap k browser mein se delete nahi karayga. Software ki recommendation to yahi hai k ap yes per click ker k information ko save hi rehnay de, mager meri advice yeh hai k yeh bhi information ap browser mein se nikal de aur No per click ker dejye.
7. Is k baad software CCleaner ki main window ap k samnay ajayegi.
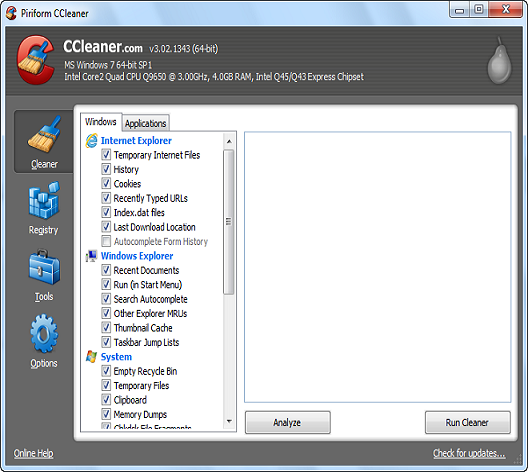
Jaisa k uper screenshot mein ap dekh saktay hai k CCleaner k 4 sections hai left hand side bar mein:
1. Cleaner
2. Registry
3. Tools
4. Options
Right now, hum baat kareingay Cleaner k feature per, aur yaha se asal kaam shuro hoga. Ager ap koi bhi system optimization software pehli dafa computer mein run ker rahay hai, to ap ko is software k results dekh ker herani hogi k ap k computer mein kitnay hi time se kitna junk mojood tha jo k problem ker raha hoga aur system ko bhi slow ker raha hoga.
The Real Action
1. Sab se pehlay mein recommend kerounga apko (at least her average computer user ko) k is software ki settings k sath ap ziada khelay nahi. Jo settings abhi is mein set hoi wi hai, wohi normal user k lye kafi hoti hai. Aur software chalanay se pehlay ager ap ne koi bhi browser open rakha hua hai to us ko bhi close kerdejye. Ab ap “Analyze button” ko press ker dejye jo k ap k computer mein jitna bhi junk hai un sab ko dhoond ker batayega k kitni falto files wagera computer mein mojood hai. Software 3 ya 4 minute hardly lega aur phir apko result show karayga jaisa k neechay screenshot mein ap dekh saktay hai .
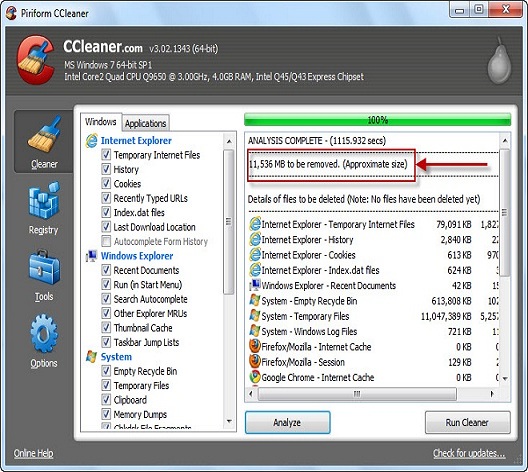
2. Result jab software show karay, to ap ko pata chal jayega k kitni junk files hai ap k computer mein, aur unsab ka size kia hai. Mein ne uper picture mein red rectangle bhi bana dia hai jaha per in sab ka size likha hua hoga (meray computer mein junk files ka size is lye picture mein kam bata raha hai q k mein aisey softwares routinely chalata rehta ho). Ab is k baad ap “Run Cleaner” k button per click kerday (jo k neechay right side per hai) taqay yeh files computer mein se delete ho jaye.
3. Jab ap “Run Cleaner” button per click kareingay to 1 dialogue box pop-up hoga jis per likha hoga “This process will permanently delete files from your system – Are you sure you wish to proceed”. Jis ka matlab sirf yeh hai k yeh sari files ap k computer mein se permanently delete ho jayeingi to ap aisa chahtay hai k nahi. Just click OK and you are done.
Uper bataye gaye steps per amal ker k ap ne successfully computer mein se sara junk data nikal dia hai. G bilqul… sirf yahi kerna tha… Lekin ab ap sath hi Registry ki problems ko bhi solve kerday taqay poora kaam 1 saath hi ho jaye. So let us talk about that.
Fixing of Registry Errors
1. Click on the Registry button (On your left hand sidebar) and ap ko aisi hi screen nazer ayegi jaisey k neechay screenshot mein ap dekh saktay hai.
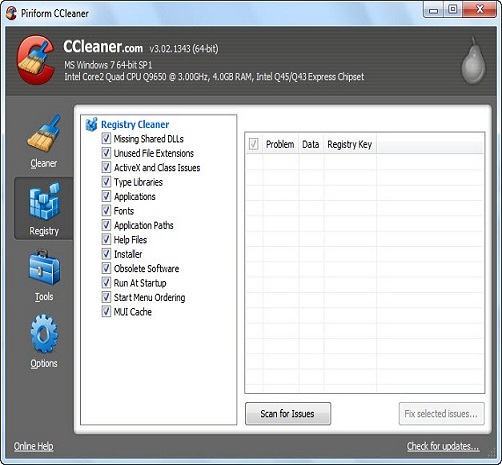
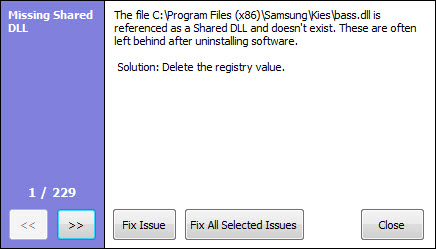
2. Jaisey k ap dekh saktay hai k is screen per kuch kernay ko hai bhi nahi siwaye “Scan For Issues” button k press kernay k ilawa. So ap is button ko click karay taqay yeh software search ker k ap ko batayega k ap k computer ki registry mein kitni problems hai, jis ka result kuch aisa hoga jaisey neechay picture mein show kia gaya hai.
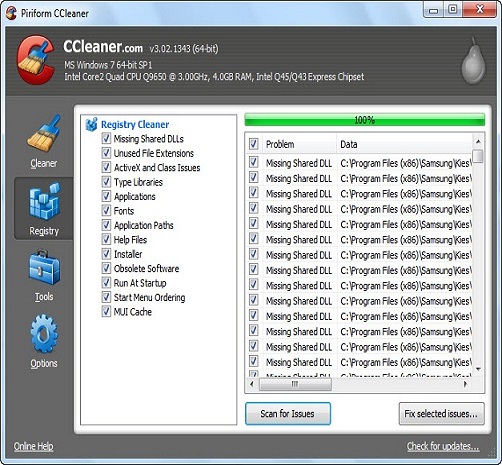
3. After viewing the result, click “Fix Selected Issues”
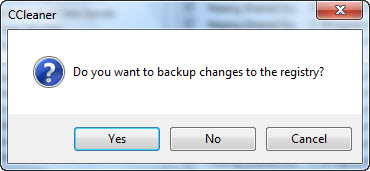
4. Is k baad ek dialogue box pop-up hoga jis per likha hoga “Do you want to backup changes to the registry” click Yes aur save kerday apnay computer k kissi folder mein. Yeh sirf ap registry file ka backup le rahay hai (Yaad rahay k ap zaroor backup lay registry ka)
5. After taking backup of registry, ek window pop-up hogi jis per multiple options hongay. Just Select “Fix All Selected Issues” jaisey k neechay screenshot mein dikhaya gaya hai.
6. Once all the cleaning is finished, Just click close. Restart your PC and you are done.
Last Words
Hope k yeh detailed article ap k lye faiday mand ho. Q k inhi chizoun ko samajh ker ap apnay computer ki sahi se maintenance ker saktay hai. CCleaner best free software hai jo k her computer user ko apnay computer mein install kerna chaiye. Yeh ap k computer mein se sara junk wagera bhi nikal deta hai aur registry ki problems ko bhi door ker deta hai, woh bhi asani k sath.
Kia apne is software ko use kia? Kia ap ko computer ki speed mein kuch farq laga? Apnay Comments / Feedback neechay box mein dena mat bholyega.
0 comments:
Post a Comment